To create studio-quality shots with AI product photography tools, you upload one clean, well-lit photo of your product, cut it away from its background, then describe the scene, lighting, and camera angle you want in plain text and let the tool rebuild the shot around the untouched product. EditorAI is the option we recommend for this because you edit with text descriptions instead of presets, so you can ask for "soft overhead light, grey seamless backdrop, subtle reflection under the shoe" and get a catalog-ready image without learning a single Photoshop tool. The rest of this guide covers what actually separates a convincing AI product shot from an obvious fake, the step-by-step workflow, and an honest ranking of the tools worth your money.
What "studio quality" actually means
Studio quality is not one thing. It is four things stacked together, and AI tools fail on different ones.
Accurate product. The sneaker in the final image must be the exact sneaker you photographed. Same stitching, same logo placement, same color. This is where most tools break down, because generative models like to invent details. Returns happen when images lie.
Believable light. Real studio light comes from a source with a direction. If your product is lit from the upper left, the shadow falls to the lower right, and the highlight sits on the upper left edge. AI scenes that look "off" usually have light coming from nowhere.
Grounded contact. The product needs to sit on the surface. A contact shadow where the object meets the table is the single detail that sells the illusion.
Consistency across the catalog. One great image is easy. Fifty images that look like one photographer shot them is the hard part. A common complaint about AI product photography is drift: Monday's batch and Thursday's batch look like different studios, and that inconsistency reads as amateur to shoppers even when they cannot say why.
The 6-step workflow
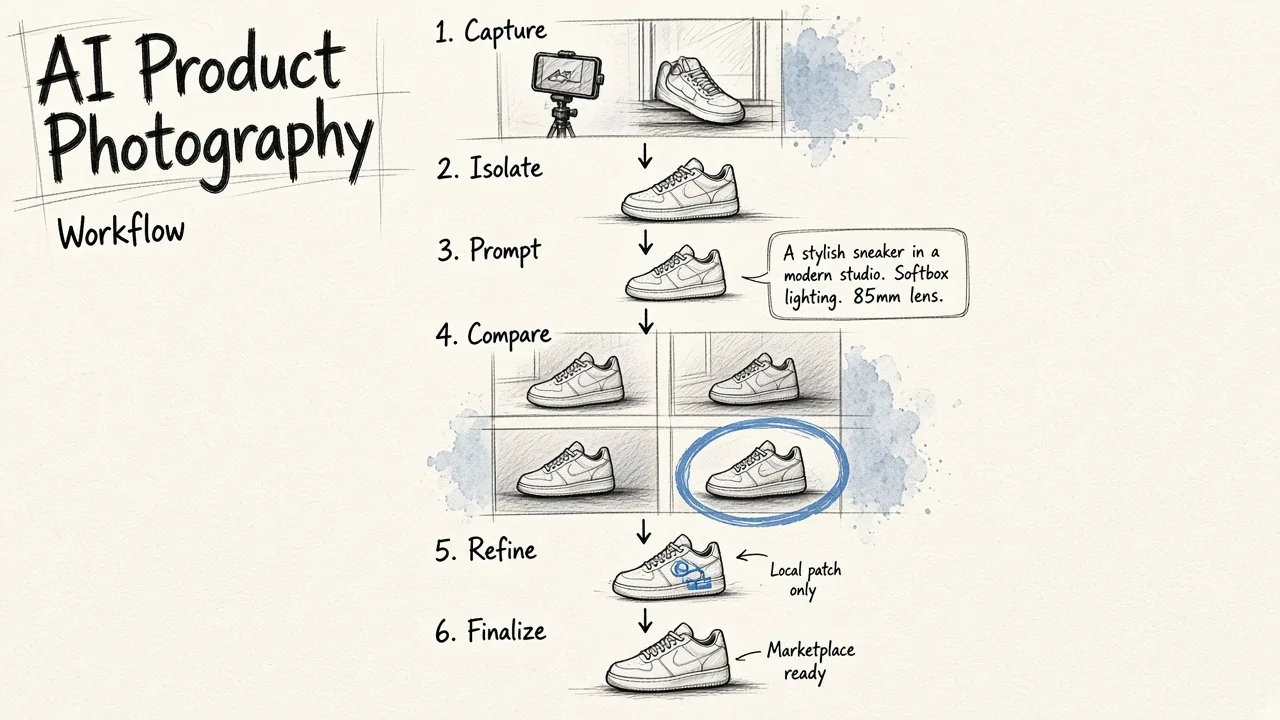
1. Shoot a usable source photo. Phone camera is fine. Put the product near a window, on a plain surface, with no harsh direct sun. Fill the frame, shoot at eye level for most products and slightly above for flat items. Wipe fingerprints off glass and glossy plastic, because AI will keep them. If you want more control at this stage, our guide to studio-quality product shots at home covers the cheap lighting setups that make AI output noticeably better.
2. Remove the background. Every downstream step works better when the product is isolated cleanly. Pay attention to the edges: hair, fur, mesh, transparent bottle necks, and shoelaces are where automatic cutouts leave artifacts.
3. Describe the scene, not the mood. "Beautiful professional photo" gives the model nothing. "Product centered on a matte white riser, light grey seamless background, soft key light from upper left, soft shadow to the right, 50mm lens, eye level" gives it everything.
4. Generate variations and compare. Never accept the first result. Generate four to six and put them side by side. Pick the one where the shadows agree with the light.
5. Fix, do not regenerate. If one thing is wrong, remove the object or patch the area rather than rolling the dice on a whole new image. Regenerating usually gives you a new problem.
6. Upscale and export to spec. Marketplace listings want clean backgrounds and specific dimensions. Lifestyle scenes are for ads, email, and social. Export both from the same source.
The best AI product photography tools, ranked
Ranked on product accuracy, control, and whether the output holds up on a real product page.
1. EditorAI
You describe the edit in plain language and it happens: swap the background, remove the stray cable, add a reflection, change the light direction, then turn the same shot into an ad creative or a short video. The advantage over preset-driven tools is control. Presets give you someone else's look; a text description gives you yours, which matters when you need the fifth image in a catalog to match the first four.
Pros: text-based editing covers background removal, object removal, relighting, and ad assets in one place, so you are not stitching three subscriptions together. Works for people and products, not just packshots. Cons: you get better results when you write specific prompts, so there is a short learning curve compared to one-click template tools.
2. Claid
Built specifically for product and fashion photography, with AI photoshoot scenes, on-model fashion generation, background removal, upscaling, and light correction. Native 4K output and an API for teams processing catalogs at volume.
Pros: strong focus on realistic lighting and shadows, proven at scale with large marketplaces. Cons: the API-first positioning makes it heavier than a solo seller needs.
3. Pixelcut Product Studio
Upload a product, pick a scene format or write a prompt, generate photorealistic shots up to 4K. Also offers an on-model format for products that sell better worn or held.
Pros: good balance of ready-made scenes and free-form prompting, plus a free tier. Cons: generic scene library means your images can look like everyone else's.
4. Pebblely
More than 25 million images generated and 100+ scene templates, from "standing on beige silk" to "in a pastel green room." Bulk generation for similar or varied backgrounds.
Pros: fastest path from upload to a usable listing photo, popular with Etsy and jewelry sellers. Cons: template-driven, so brand-specific looks are harder to nail.
5. ProductAI
Adaptive templates by category (fashion, cosmetics, skincare, fragrance, beverage), plus short video creation, background swapping, object removal, and upscaling. Plans start around 16 euros per month for roughly 40 product photos.
Pros: no prompting required if you just want a competent category-standard shot. Cons: less useful when your product does not fit a template category.
6. Nightjar
Purpose-built around consistency, with reusable photography styles that let you apply the same lighting and camera feel across an entire catalog. 150+ curated styles.
Pros: the best answer to catalog drift. Cons: narrower feature set, built for teams managing many SKUs rather than a single product launch.
7. Canva AI Product Photos and Packify
Free or near-free entry points for anyone who just needs a decent background swap.
Pros: zero cost to try, familiar interface if you already design in Canva. Cons: limited control over lighting and shadow realism, which is exactly what studio quality depends on.
If you want a longer breakdown of how these compare on automation and batch workflows, we covered that in our roundup of automated product photography tools.
What this looks like in practice
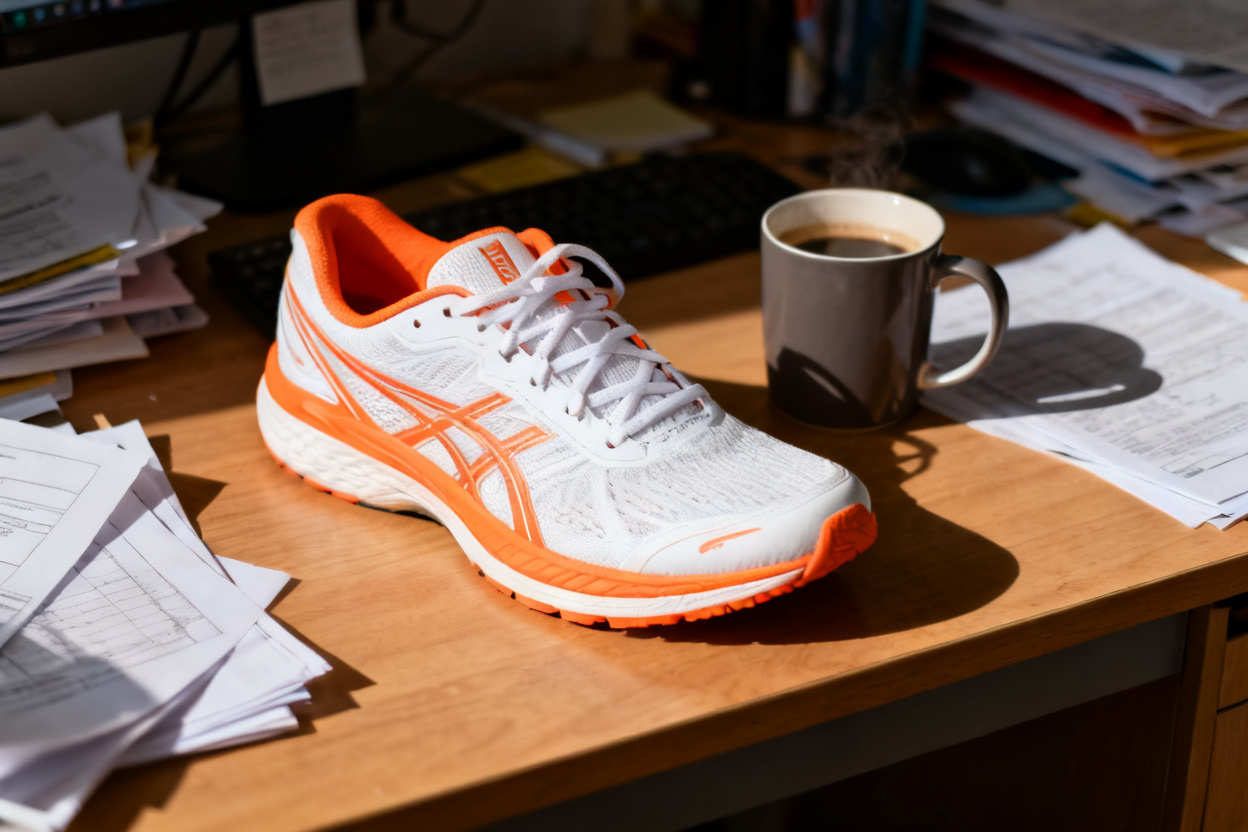
Here is an ordinary sneaker photo, shot on a plain surface with uneven light, the kind of image most sellers start with:
And here is the same shoe after a text instruction describing a studio backdrop, directional key light, and a soft contact shadow:
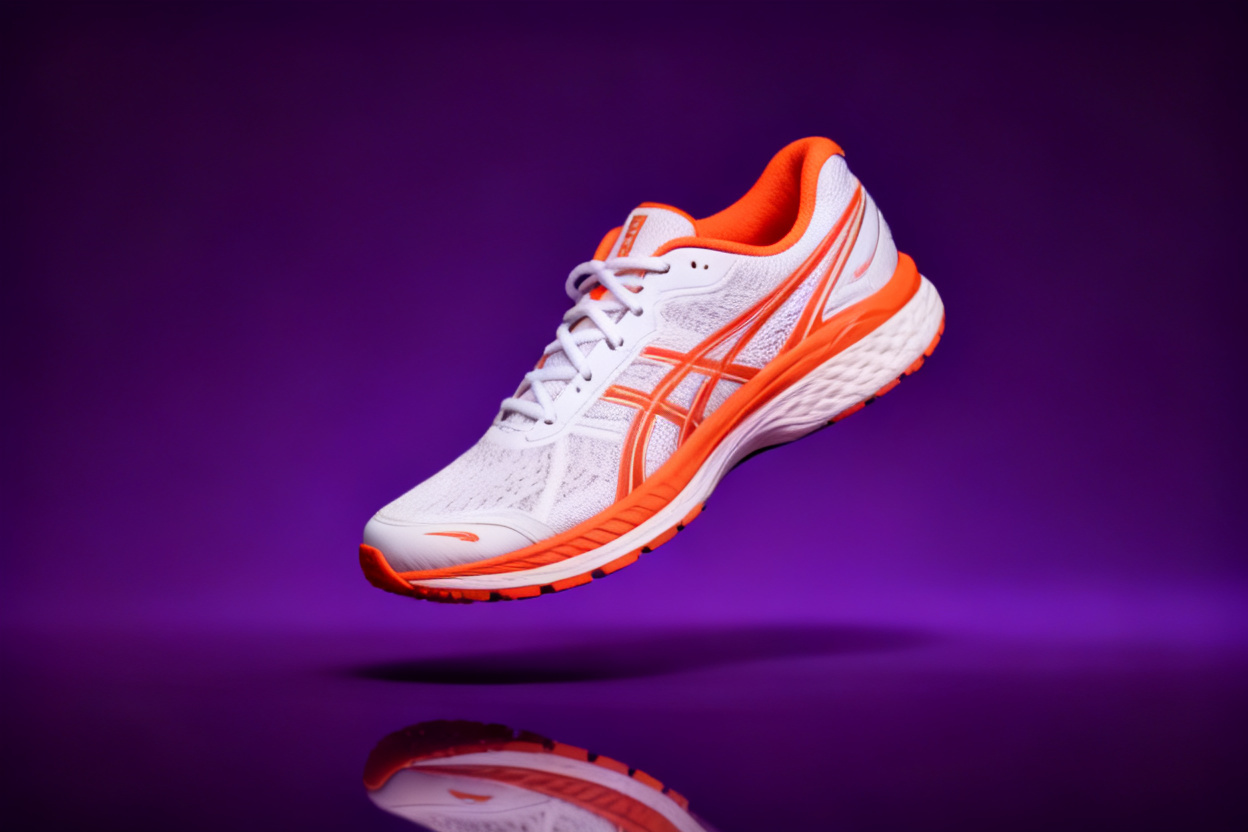
Nothing about the shoe changed. The stitching, the colorway, and the sole pattern are the same, which is the whole point. What changed is everything around it. That is the distinction to hold onto: good AI product photography restyles the scene and leaves the product alone.
Prompts that produce studio results
Write your prompt in four parts and you will get consistent output:
- Surface and background: "on a light grey concrete slab, soft grey seamless backdrop"
- Light: "single soft key light from the upper left, gentle fill on the right, soft shadow falling right"
- Camera: "eye level, 50mm, shallow depth of field" or "top-down flat lay"
- Mood or color: "warm neutral tones, minimal, editorial"
Save the prompt that works and reuse it across every SKU. That one habit solves most consistency problems without any special feature.
Mistakes that make AI shots look fake
Floating products. No contact shadow, no weight. Always check where the object meets the surface.
Light that disagrees with itself. A bright rim on the left and a shadow also on the left means two impossible light sources.
Over-polished texture. Fabric with no weave, leather with no grain, and skin with no pores all read as synthetic. If your tool smooths texture, dial it back or upscale from the original.
Backgrounds that fight the product. Busy scenes win on social and lose on a product page. Keep the listing shot clean and save the styled scene for ads.
Inconsistent crop and framing. Even perfect images look sloppy when the product occupies a different share of the frame in every shot.
Where to start
Take your three best-selling products, shoot one clean photo of each, and run each through the six-step workflow. Compare the new images against your current listings. If the AI versions are sharper, better lit, and consistent with each other, roll the same prompt across the rest of the catalog. Sellers working through this at scale can see how the pieces fit together on our e-commerce editing page, and EditorAI is free to test on a single product before you commit to anything.