
To learn how to create studio quality product shots at home, you need to master three fundamental elements: controlled lighting, stable composition, and clean post-production. By positioning a continuous light source or diffused window light at an angle, placing your merchandise on a seamless curved sweep, securing your camera or smartphone on a steady tripod, and utilizing modern editing software to refine the scene, you can produce crisp, commercial-grade images without renting an expensive studio.
Selling online requires visuals that build trust immediately. When shoppers browse a catalog or marketplace, clear details, true-to-life colors, and distraction-free backgrounds signal quality. You do not need thousands of dollars in high-end gear to achieve this standard. With an understanding of physics, basic styling, and efficient editing, your living room or garage can yield exceptional commercial assets.
The Essential Home Studio Equipment Checklist
Setting up a functional photography bay at home requires minimal square footage and a few carefully selected tools. The goal is consistency and control, allowing you to replicate the same lighting and framing across every product variant.
Here is what you need to get started:
- A stable camera or smartphone: Modern smartphones feature capable sensors, manual exposure locks, and high resolutions. A dedicated DSLR or mirrorless camera offers greater control over depth of field and lens selection, but either option works well.
- A sturdy tripod: Camera shake introduces motion blur that ruins fine product textures. A tripod locks your framing in place, keeps your horizon lines level, and frees your hands to adjust props.
- A seamless sweep: Rather than placing an item against a flat wall with a visible floor crease, use a flexible sheet of white poster board or heavy paper clamped to a table or stand. Curving the paper creates an uninterrupted transition from floor to backdrop.
- Diffused lighting sources: Direct sunlight or bare light bulbs cause harsh, distracting shadows. Use softbox lights, white bedsheets, or translucent shower curtains to scatter light evenly across the subject.
- White and black foam boards: Inexpensive foam core boards from a craft store serve as reflectors to bounce light into shadow areas, or as flags to block unwanted glare and reflections.
- Cleaning tools: Microfiber cloths, compressed air canisters, and cotton gloves help eliminate dust, lint, and smudges before you press the shutter.
Mastering Lighting Without Commercial Strobes
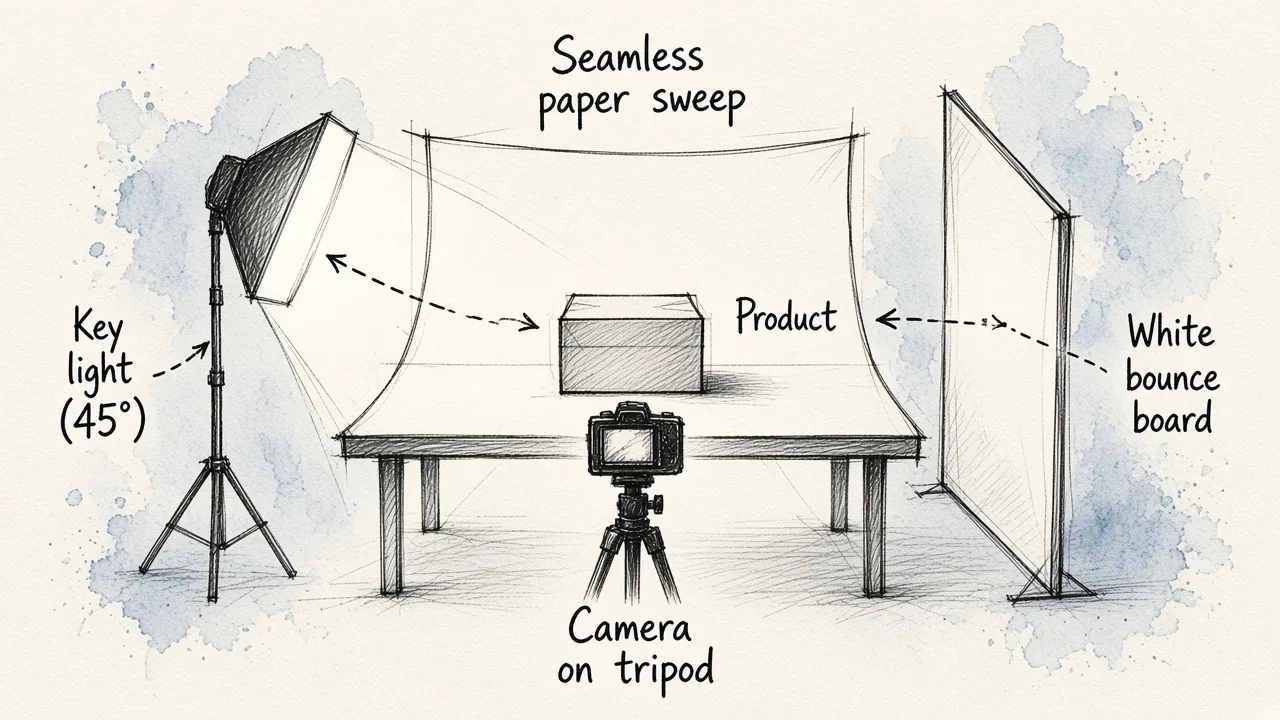
Lighting dictates the shape, texture, and perceived value of an object. In a commercial studio, photographers balance key lights, fill lights, and rim lights. You can replicate this setup at home with a single primary light source and inexpensive reflectors.
Begin by identifying your key light. If you rely on natural daylight, set up your shooting table perpendicular to a large window, ideally facing north or south to avoid harsh, shifting direct beams. If you prefer working with artificial lights, position a daylight-balanced LED lamp at a 45-degree angle to the product. This angle creates soft modeling shadows that highlight depth and dimension.
Next, address the shadow side of the product. An unlit side can appear murky and obscure important design features. Place a white foam board directly opposite the key light, angling it until light bounces back onto the darkened edges. If you need a more dramatic, high-contrast look, replace the white board with a black foam board to absorb stray light and define crisp edges.
Reflective products, such as jewelry, glassware, or polished electronics, present unique challenges. They act like mirrors, capturing reflections of your room, your tripod, and your clothing. To solve this, construct a light tent or place diffusion panels close to the item. Surrounding the object with clean white surfaces ensures that any reflections appearing on its surface are uniform, bright highlights rather than cluttered room details.
Composition, Angles, and Staging Principles
A studio shot must present the product accurately while remaining visually compelling. Consistency in framing across your entire catalog gives your store a cohesive, professional feel.
Start with the primary e-commerce shot, often called the hero image. This is typically an eye-level or slight three-quarter angle capture against a plain, neutral background. Position the product dead center to ensure it displays neatly inside square or vertical thumbnail grids on e-commerce platforms.
Once the primary angle is locked, capture secondary views:
- Direct top-down (flat lay): Excellent for apparel, stationary, cosmetics, and organized product bundles.
- Macro detail shots: Move close to capture stitching, materials, embossed logos, and ports. Buyers rely on these close-ups to evaluate build quality.
- Profile and back angles: Provide a complete 360-degree understanding of dimensions, fastenings, and labels.
Pay close attention to negative space. If you plan to use these images for promotional banners, social media ads, or email marketing, leave breathing room around the product. This empty space allows graphic designers to add typography, price tags, or promotional badges without crowding the subject. For broader advice on visual presentation across digital channels, our guide on how to look professional online in photos and video covers key framing and presence techniques.
Camera Settings for Crisp, Clear Results
Relying on full auto mode often produces mixed results because the camera tries to average out bright white backdrops, resulting in gray, underexposed products. Taking manual control of your camera or smartphone app yields far sharper, more predictable images.
- ISO: Set your ISO to the lowest native value, typically 100 or 200. Higher ISO levels introduce digital noise and grain that soften edges and degrade color accuracy.
- Aperture: For product photography, you generally want the entire product sharp from front to back. Choose a narrower aperture between f/8 and f/11. Shooting wide open at f/1.8 or f/2.8 may look artistic, but it can blur vital edges or labels.
- Shutter Speed: Because your camera is mounted securely on a tripod and your subject is stationary, shutter speed can be as slow as needed to achieve proper exposure. Use a two-second timer or a remote shutter release to ensure your finger pressing the button does not shake the camera.
- White Balance: Set your white balance manually using a gray card or a preset like Daylight or Tungsten, depending on your bulbs. Auto white balance shifts between shots, creating jarring color discrepancies across your product catalog.
Elevating Raw Captures with AI Post-Production
Even with meticulous staging, physical shooting environments impose limits. Dust settles on surfaces, backdrops show faint creases, and domestic spaces rarely provide the infinite depth of a commercial stage. Post-production bridges the gap between a good home photo and a flawless studio asset.
Modern workflows increasingly leverage artificial intelligence to handle laborious isolation and retouching tasks. Platforms like EditorAI allow merchants to transform everyday captures into refined e-commerce assets in seconds. Instead of manually cutting out paths using complex desktop software, you can remove backgrounds, isolate complex edges, and eliminate surface flaws with automated precision.
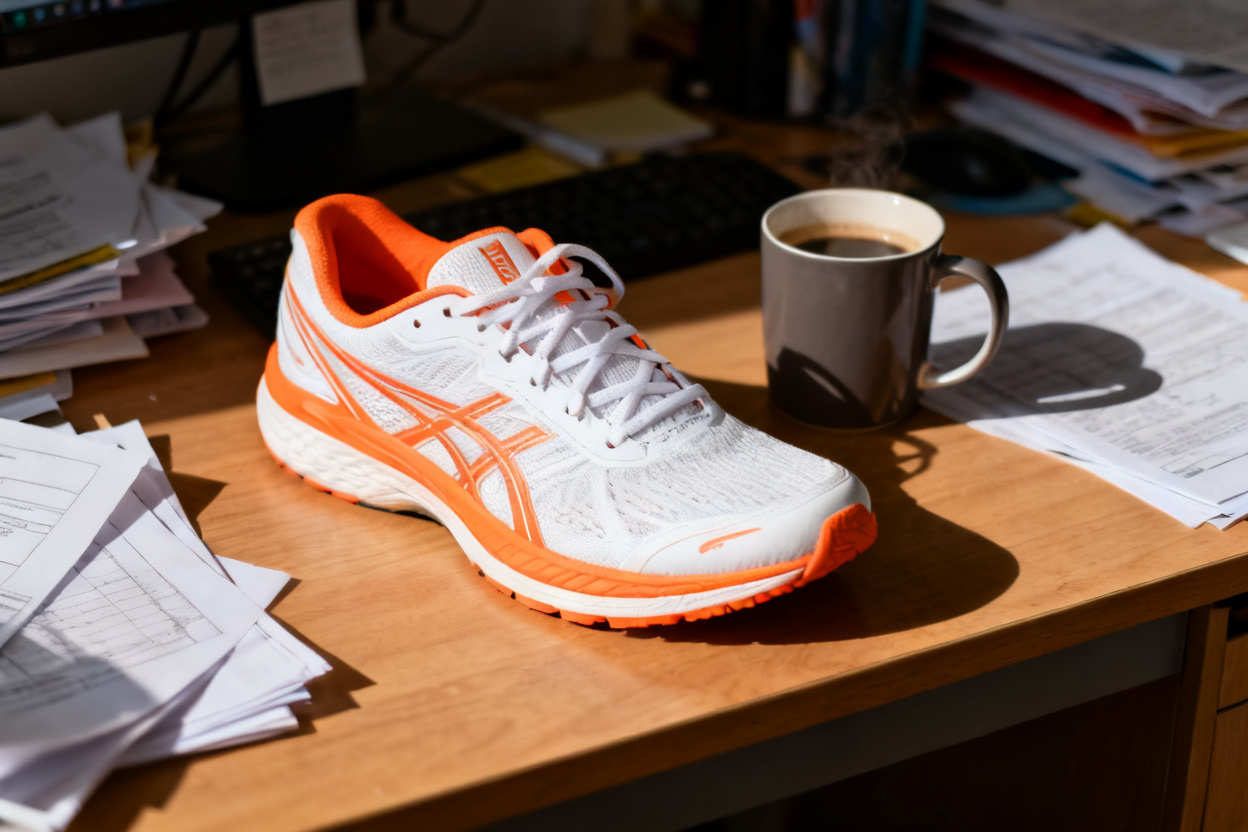
A standard capture taken in a home setting often includes irregular flooring, uncontrolled falloff, and color tinting from ambient walls.

By processing the raw capture through dedicated tools, you can replace distracting backgrounds with clean studio gradients, generate natural contact shadows, and maintain realistic reflections. We designed EditorAI to give businesses the speed and polish typically reserved for dedicated production houses. For an in-depth breakdown of how digital workflows compare financially to traditional studios, read our analysis on understanding the cost of virtual photography.
Common At-Home Product Photography Mistakes to Avoid
Avoiding a few frequent missteps will immediately elevate your output above amateur listings:
- Neglecting surface preparation: A tiny fingerprint on chrome or a speck of lint on black fabric can take twenty minutes to clone out in an editor. Clean your products thoroughly before staging them. Keep a roll of painter tape handy to quickly lift dust from fabrics.
- Mixing color temperatures: Never combine warm household incandescent bulbs with cool daylight from a window. Mixed lighting produces conflicting blue and orange casts across the product that are nearly impossible to correct cleanly in post-production. Turn off overhead room lights and rely solely on your chosen source.
- Shooting from incorrect perspectives: Wide-angle lenses placed too close to a small item will warp its geometry, making the front look unnaturally bulbous and the rear tapered. Back up and zoom in slightly, using a focal length equivalent to 50mm or 85mm to render realistic proportions.
- Neglecting contact shadows: When merchants isolate an item on pure white, they sometimes erase all shadows entirely. Without a subtle grounding shadow directly beneath the base, the product appears to float uncomfortably in mid-air.
Building a Repeatable Workflow for Catalog Consistency
If you sell multiple items, the real challenge lies in making photo number fifty look identical in scale, height, and lighting to photo number one. Systematic documentation is the key to repeatability.
Use masking tape on your floor to mark the exact position of your table legs, light stands, and tripod feet. Measure the distance from the lens to the center of your sweep, and note the height of the tripod collar. Record the camera settings, including focal length, aperture, shutter speed, and white balance Kelvin value, inside a simple setup sheet.
When batch shooting, arrange products by size and color. Shoot all small, light-toned items together, then adjust your lighting once for darker or larger merchandise. Maintaining this orderly progression saves setup time, cuts editing overhead, and delivers a uniform storefront that instills confidence in prospective buyers.