A free background generator uses artificial intelligence to isolate the subject of an image, erase the original backdrop, and synthesize an entirely new environment based on preset styles or custom text descriptions. Instead of spending hours masking fine edges manually in desktop software, tools like EditorAI allow you to generate realistic backdrops and commercial product settings in seconds through automated foreground detection and generative prompt rendering. Whether you need a crisp studio backdrop for an e-commerce catalog or a stylized digital environment for social content, modern AI tools make this process fast, accessible, and completely browser-based.
How AI Background Generators Work
Traditional photo editing relies on clipping paths, manual lasso selections, and layer masks. Generative AI alters this workflow by combining computer vision with diffusion models.
First, the algorithm analyzes the visual data to distinguish between the foreground subject (such as a person, product, or vehicle) and the surrounding scene. It computes an alpha matte that preserves difficult details like hair strands, fabric textures, and semi-transparent edges. Once the foreground is separated, the AI processes your background input. Rather than simply pasting a static stock photo behind your cutout, generative engines render an environment that dynamically calculates lighting direction, shadows, and perspective so the subject looks naturally grounded in the space.
Step-by-Step: Using a Free AI Background Generator
Getting professional results from an AI tool requires a clean input and clear instructions. Follow these steps to produce high-quality scenes.
1. Prepare and Upload Your Source Image
Start with an image where the primary subject is sharply focused. While AI cutout models handle complex scenes reasonably well, high contrast between your subject and the original background will yield the cleanest edges. Most online platforms accept JPG, PNG, and WebP files up to standard web resolutions. Drag and drop your image into the workspace to let the automatic background removal tool isolate the subject.
2. Choose Your Generation Method
Once your subject sits on a transparent canvas, you have two primary ways to create the new backdrop:
- Thematic Templates: Choose from pre-rendered categories like minimalist studio podiums, warm cafe tables, solid pastel tones, or outdoor nature scenes. This approach is fast and guarantees a balanced composition.
- Text Prompts: Type a descriptive prompt to render a custom environment. You can specify materials, lighting conditions, and depth of field to tailor the scene to your project.
3. Describe the Scene with Specific Lighting and Materials
If you write a prompt, avoid vague phrasing like "nice room." Instead, specify surfaces and ambient light so the generative engine blends the environment with the subject's existing illumination. For instance, describe "a smooth marble tabletop, soft morning window light from the left, blurred modern kitchen in the background, commercial photography."
4. Review Edge Blending and Contact Shadows
Check the perimeter of your cutout. Pay special attention to the contact points where an object meets a surface. A convincing background generator creates subtle cast shadows directly beneath the item to prevent it from looking like a floating sticker.
5. Download in High Resolution
Export your finished composition. If you plan to use the visual across different platforms, export the file in PNG format to preserve maximum clarity, or download a version with transparent layers if your platform supports layered exports.
How to Write Prompts for Convincing Backgrounds
The secret to generating believable backdrops is aligning the scene with the original photo's built-in lighting. AI can create any background imaginable, but if your subject was photographed under harsh direct sunlight and you place it in a dim, candlelit lounge, the human eye immediately spots the mismatch.
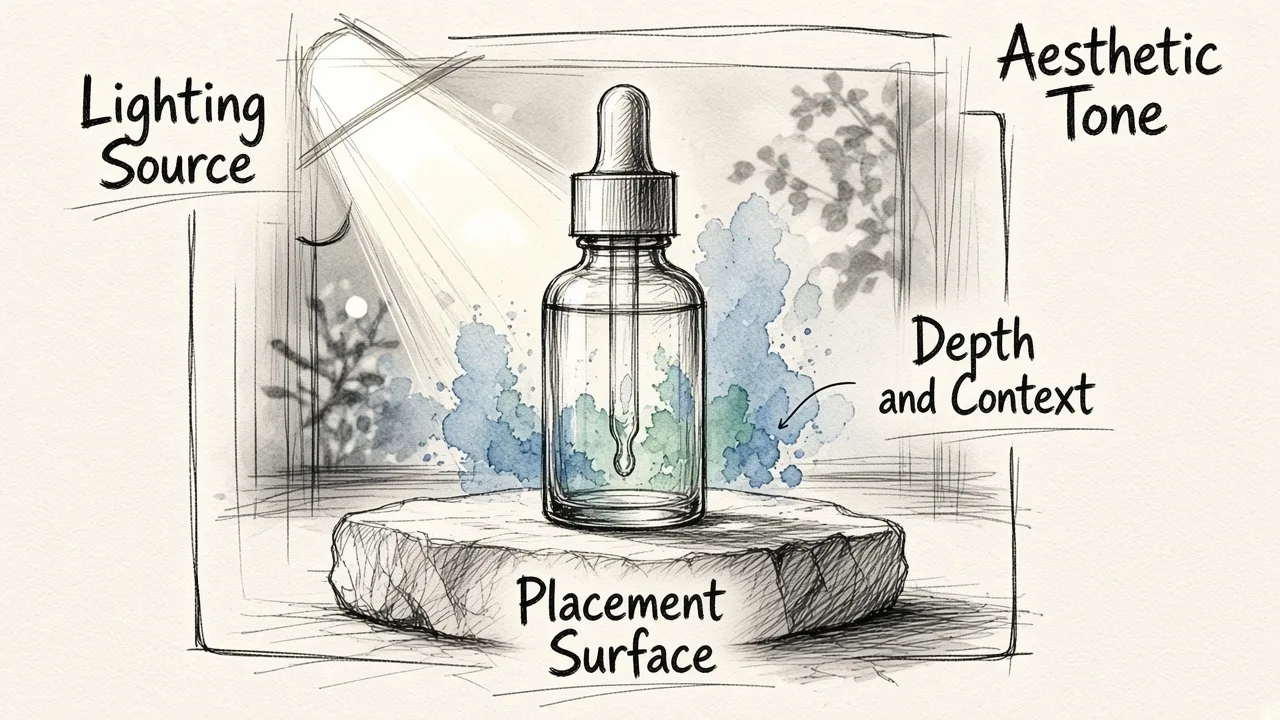
When writing prompts, include these four elements:
- Placement Surface: Define what the object rests on (e.g., weathered oak desk, concrete pedestal, satin cloth).
- Depth and Context: Describe what appears behind the surface (e.g., out-of-focus tropical plants, minimalist white office wall, cozy bokeh city lights).
- Lighting Source: State where the light originates (e.g., diffused daylight, side rim light, warm studio softbox).
- Aesthetic Tone: Mention the visual style (e.g., editorial portrait, clean product display, cinematic matte).
If you are exploring different ways to update your creative assets across projects, learning how to change the background of a picture for free with AI helps you understand how different prompt modifiers influence edge feathering and ambient color bleed.
Comparing Popular Free AI Background Options
Different tools serve different production needs, ranging from rapid social media swaps to detailed visual production. Here is how leading options compare:
| Tool | Best For | Standout Strength | Practical Limitation |
|---|---|---|---|
| EditorAI | Marketing assets, product shots, headshots | Fast text-guided generation with realistic lighting and scene compositing | Advanced parameter controls require paid credits |
| Adobe Express | Quick template-based web graphics | Seamless integration with pre-built design assets and text layouts | Generative prompt variations can be limited on free accounts |
| PhotoRoom | Batch e-commerce product listings | Reliable cutout engine and catalog-focused surface templates | High-resolution exports often require a subscription |
| Canva | Social media posts and presentations | Huge library of design templates and accessible browser UI | Background changer tools are primarily gated behind paid tiers |
| remove.bg | Quick cutouts for basic design work | Rapid edge isolation for standard portraits | Focuses on transparency rather than custom generative backgrounds |
For a broader evaluation of how top tools handle edge preservation and rendering speed, see our breakdown of the 12 best free AI background generators compared.
Practical Use Cases for AI Backgrounds
Automated scene generation simplifies repetitive visual tasks across several industries:
- E-Commerce and Catalog Photography: Instead of renting a commercial studio and buying staging props, online sellers place products on AI-generated wooden counters, bathroom shelves, or stone tiles.
- Professional Headshots: Job seekers and remote teams can replace cluttered home offices with subtle, blurred professional interiors or neutral gray textures suitable for resumes and professional networking profiles.
- Social Media Advertising: Digital marketers can take one base image of a product and generate seasonal variations (spring pastels, autumnal leaves, festive winter decor) without organizing new photoshoots.
- Content Thumbnails: Video creators can remove distracting personal spaces and replace them with vibrant, high-contrast digital graphics that grab attention in feeds.
Best Practices for Natural-Looking Results
To avoid the artificial, pasted-together look common in amateur edits, keep these principles in mind:
- Keep Aspect Ratios Consistent: Ensure your generated background matches the canvas dimensions of your target output. Stretching or cropping an image after rendering can introduce blurriness.
- Control Depth of Field: Real camera lenses blur distant elements. Asking the AI for a "shallow depth of field" or "blurred background" keeps the viewer's focus locked on your main subject.
- Watch for Color Casts: If your original cutout has strong green reflections from an outdoor shoot, placing it against a warm orange desert will clash. Use photo adjustment tools to balance temperatures before or after generating the scene.
By combining sharp cutouts with descriptive, lighting-aware prompts, anyone can produce studio-grade visuals in minutes without specialized graphic design training.