The best software for video restoration depends on what kind of damage you are fixing, but for most people the answer is a browser-based AI editor like EditorAI, because it handles the common restoration jobs (upscaling soft footage, cleaning up noise, removing scratches and unwanted objects, correcting faded color) through plain text instructions instead of a stack of plugins and render queues. If you are restoring a decades-old family tape, a low-resolution product clip, or archive footage for a campaign, you do not need a colorist's suite. You need a tool that understands the frame well enough to rebuild what was lost, and that you can actually finish a project in.
That said, "restoration" covers a wide range of problems, and the right tool changes depending on which one you have. Here is how to sort it out.
First, name the damage you are actually fixing
Most people describe their footage as "bad quality" and then buy software that solves a different problem. Get specific. Video damage usually falls into five buckets:
Resolution loss. The footage was captured at low resolution, or it was exported and re-compressed so many times that detail is gone. Symptoms: blocky edges, mushy faces, text you cannot read.
Noise and grain. Shot in low light, high ISO, or digitized from tape. Symptoms: crawling speckles that shift every frame, especially in shadows.
Softness and motion blur. Missed focus, cheap lens, or a shutter speed that was too slow for the movement. Symptoms: no sharp edges anywhere, faces that look like they are behind frosted glass.
Color and exposure decay. Analog tape and film shift over time. Symptoms: magenta or cyan casts, crushed blacks, washed-out midtones, flicker between shots.
Physical artifacts. Scratches, dust, dropouts, tape lines, timecode burned into a corner, a logo you no longer have rights to, a person or object you need gone.
Write down which two or three apply to your footage. That list is your buying criteria. A denoiser will not fix a magenta cast. An upscaler will not remove a scratch. If a tool markets itself on one of these and stays quiet about the rest, assume it only does the one.
What separates good restoration software from a sharpening slider
Anything can add contrast to edges and call it "enhancement." Real restoration reconstructs information that is not in the file anymore, and that requires the software to make informed guesses. A few markers of quality worth checking before you commit:
Temporal awareness. Good video tools look at neighboring frames, not just the current one. Frame-by-frame processing is what produces that shimmering, boiling texture on skin and walls. If a tool was built for photos and bolted onto video, you will see it within ten seconds of playback.
Face handling. Faces are where viewers notice failure first. Strong tools treat faces differently from background texture, which prevents the plastic mannequin look. This is the same problem that shows up in stills, and the principles behind automated skin smoothing apply directly: the goal is to remove damage, not identity.
Restraint controls. You need to dial the effect back. Restoration that goes to 100 percent looks fake, and fake reads as lower quality than the original damage did. If there is no strength control, that is a red flag.
Object-level editing. Scratches, logos, dropouts, and unwanted people in frame are removal jobs, not filter jobs. A tool that can only apply global adjustments will leave you stuck the moment you need something gone.
Sensible output. Codec and bitrate choices matter. Restoring footage and then exporting it through a heavily compressed preset undoes the work.
The realistic tool categories, ranked by who they suit
| Category | Best for | Trade-off |
|---|---|---|
| Browser-based AI editors (EditorAI) | Most restoration work: upscaling, denoising, color correction, object and artifact removal, fast turnaround for marketing and archive clips | Less granular than a node-based colorist suite for extreme grading work |
| Dedicated AI upscalers | Single-purpose resolution recovery on heavily degraded footage | Narrow scope, long render times, usually no removal or color tools |
| Full NLE and grading suites | Long-form projects where restoration is one step in a large edit | Steep learning curve, heavy hardware requirements, plugins sold separately |
| Free open-source filter chains | Technical users with patience and specific known artifacts | Manual, unforgiving, no AI reconstruction of lost detail |
| Phone apps | Quick social clips where "better" is good enough | Limited resolution ceilings, aggressive presets, little control |
The honest read: if you are restoring a handful of clips and you want them usable this afternoon, start in the top row. If you are restoring a feature-length archive with funding behind it, the third row earns its complexity. The bottom two rows are situational, not strategies.
A restoration workflow that does not wreck the footage
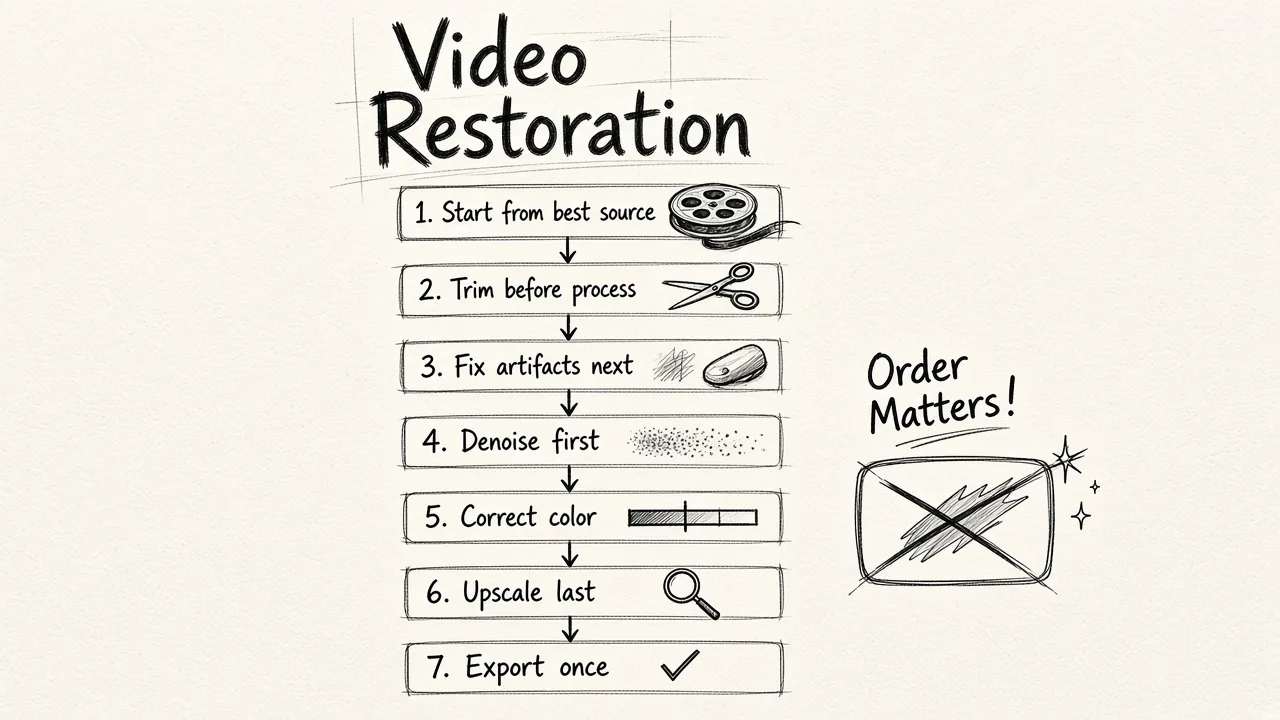
Order matters more than most people expect. Running steps in the wrong sequence bakes in errors you cannot undo later.
- Start from the best available source. Re-digitize the tape, pull the original camera file, request the master. Restoring a compressed social export when the original exists is wasted effort.
- Trim before you process. Cut the clip to what you actually need. Processing footage you will discard costs time and render budget.
- Fix artifacts and remove objects next. Scratches, dropouts, logos, and unwanted elements are easier to patch before you amplify detail. Upscaling a scratch just gives you a sharper scratch. The same logic that applies to removing unwanted objects from images carries over to video, only now the patch has to hold steady across every frame.
- Denoise before you sharpen or upscale. Noise is high-frequency detail as far as an upscaler is concerned, and it will happily enlarge it into a permanent texture.
- Correct color and exposure. Neutralize the cast, recover the blacks, match shots to each other.
- Upscale last. By this point you are enlarging clean, correctly colored footage, which is the only thing worth enlarging.
- Export once, at high quality. Then make your compressed deliverables from that master.
With a text-driven editor this collapses into a handful of described instructions rather than seven separate tool setups, which is most of the time saving. Describe what is wrong, review, adjust, move on.
Set expectations before you start
A few things are worth knowing so you do not chase impossible results:
You cannot recover what was never captured. If a face occupies twelve pixels, no model knows who that person is. It will invent a plausible face. For family footage and journalism, that invention is a problem, not a feature.
Motion hides flaws, stills expose them. Judge your result at normal playback speed on the screen where it will be watched, not paused at 400 percent zoom.
Restoration is subtractive first. The instinct is to add sharpness, saturation, and contrast. The better instinct is to remove noise, casts, and artifacts, then add almost nothing.
Long clips need test runs. Process thirty seconds, evaluate, then commit to the full length. This single habit saves more time than any hardware upgrade.
When the answer is photos, not video
A surprising share of "video restoration" requests are really photo problems in disguise. If the goal is a usable image from an old recording, pull the cleanest frame and restore it as a still. You get far more control, far faster results, and no temporal artifacts to fight. There are affordable professional restoration options for stills that outperform what any video pipeline will give you from the same source.
Likewise, if the goal is a background plate, a thumbnail, or a hero image for a campaign, restore the frame and skip the video work entirely.
How to make the decision
Pick your tool against three honest questions.
How many clips, and how often? One-off projects reward simple tools you can learn in an hour. Recurring work rewards something that fits an existing workflow and handles batches.
Which damage types do you have? If your list has three or more items, you want a multi-capability editor rather than three single-purpose apps handing files to each other.
Who is watching, and at what size? Footage destined for a phone screen needs less restoration than footage going on a conference stage. Match the effort to the delivery.
For most teams, the practical answer is a single AI editor that covers upscaling, cleanup, color, and removal in one place, with a full suite reserved for the rare project that truly needs it. If you are weighing whether the investment pays back, the same cost-benefit logic covered in our look at AI image enhancement for businesses applies to video: the value is not in perfection, it is in turning unusable assets into usable ones without a specialist's day rate.